PowerPoint 2003 User Guide
Starting with PowerPoint program
Click the Start button, select Programs, then select the next Microsoft Office and click Microsoft Office PowerPoint 2003.
Only Note: In previous versions of Office - Click Start, select Programs, then select Microsoft PowerPoint.
Immediately, you'll see pictures of the program as shown below. The right is the bar Getting Started will help you use fast some commonly used functions.

If you do not use the bar Getting Started you can disable this by clicking the Close icon (X). You can start by clicking the Create a new presentation ... (Create a new presentation) at the bottom taskbar.
Part of the screen PowerPoint 2003:
Part of the screen PowerPoint 2003:

To enter a text slide show
Slide in pane in PowerPoint, in the box labeled "Click to add title". A simple click on the box and enter the subject line.
For example, you can enter "file is my first slide show"
Then click 'Click to add subtitle "and to enter a few paragraphs on it.
Save and close a slide show
This feature allows you to save the new slide show is available on disk or, if not save the file, you will not be able to view the slide show. Each store, you can reopen the file to view or rearranged.
How to save a file slideshows
On the File menu, choose Save

If it is a new file, the Save As dialog box appears, select the location folder / drive to save the file by clicking the arrow on the right Save in: click down and select the desired vitri. Or click on a number of objects in the left column (including Desktop, My Documents, My Computer ...)
Enter the file name in File name entry. Default mode is Presentation1 file name, you can use it or put a different name.
We let "presentation" for the file name first, click on the Save button to save. Note: At this time recorded in the file My Documents folder.
Close file slideshow
On the File menu, click Close. Or click on the icon Close Window
If you do not save the file when closing a dialog box will appear asking if you want to save the slide show before closing or not?
- Click Yes to save before closing - Or Click No to not save before closing. - Click Cancel to bypass operation. - Exit Microsoft PowerPoint
Click the Close icon (X) in the right corner of the screen. Lesson 2: Creating Slide performances ... where to start?
Show Task Pane (in the case was closed)
From the View menu, click Task Pane (or use the shortcut Ctrl + F1)

Select different Task Panes
Click the drop down arrow in the Other Task Panes and select Task Pane from the menu.
Click the drop down arrow in the Other Task Panes and select Task Pane from the menu.

Show New Presentation
From the File menu, click New
From the File menu, click New

Open demo available
From the New Presentation, click From existing presentation ... to show New from Existing Presentation dialog box, then select the file to open
For example, you select the file performed first created from an article.
From the New Presentation, click From existing presentation ... to show New from Existing Presentation dialog box, then select the file to open
For example, you select the file performed first created from an article.

Click the Create New button. The demonstration was open and you can change if necessary
Create a new demos
Click Blank Presentation in the New Presentation Pane or click the New icon on the Standard (Standard toolbar)
Appears the Slide Layout allows you to choose performance models already theocac layout text, content or both text and content
Create a new demos
Click Blank Presentation in the New Presentation Pane or click the New icon on the Standard (Standard toolbar)
Appears the Slide Layout allows you to choose performance models already theocac layout text, content or both text and content

Click on a specific layout and start creating slide (the slide show)
Outline and Slides Tabs
TabOutline for showing how line out of the title and text of each slide in the presentation. The slides can be prepared within the scope of how this way. If you want to edit documents and slide trongvung border, Outlining toolbar will be used to make congviec it.
Resize Outline and Slides Tabs
Click area Slides or Outline tab
Click the down arrow next to the Zoom box on the Standard and choose the percentage you prefer.
Slides tab displays all the slides in the demo with photos nho.Vung Slides tab is an easy way to adjust the trinhdien. You can change a slide by clicking on it

4 showing the PowerPoint slide show
To see how different the PowerPoint show, from the Menu Bar, click View, you'll see four types of views. Click on each one to see clearly specified.
To see how different the PowerPoint show, from the Menu Bar, click View, you'll see four types of views. Click on each one to see clearly specified.
1 *. Normal View (View normal): is the default display in PowerPoint. All slides are canchinh will be displayed, including the Slide Pane, Outline and Slides pane caNotes
2 *. IDEs in the demo is: Helping you rate the order, add, or remove the slide. You can also preview the image applies to individual slides
3 *. The Slide Show View (Slide slideshow mode): This allows you to see the demo as a slideshow. Trinhdien your current version of the full screen and you can see the effects of its animated slideshows.
4 *. The Notes View (view are the notes): The notes will be displayed as a print out. Attention as part of a small slide phienban and content note is entered in the Notes below Paneo slide. Lesson 3: The PowerPoint toolbar
PowerPoint toolbar to do?
PowerPoint has 13 toolbars, including the Task Pane. By default, bar Standard (Standard toolbar), Formatting (audio format) and Drawing (Drawing toolbar) has been shown already.
The toolbars are only used for each separate function in PowerPoint.
A toolbar
From the View menu, select Toolbars and then select the toolbar you want displayed (you will see a check mark beside the toolbar you have shown)
Hide a toolbar
From the View menu, select Toolbars
Option to hide the toolbar (you will not see a check mark next to the toolbar when it is hidden)
Standard toolbar
Cacbieu the Standard toolbar standard is usually used for the operation dongthuong text. When the mouse cursor over an icon, you'll clearly see the effect and description of the icon. Click bieutuong / action you want to apply for the slide.
The icon on the Standard toolbar and its functions:
New: Start a new slide show file
Open: Open a slideshow
Save: Save a file slideshows
Permission: Set permission for opening a file and change the slideshow
E-mail: Send files as email slideshow
Print: Print file slideshows
Print Preview: Preview when in
Spelling: The program checks spelling
Search: Display basic search box
Cut: Cut the text or selected objects Clipboard
Copy: Copy text or object selected Clipboard
Paste Paste from Clipboard item selected
Format Painter: Copy format
Undo: Skip operation Proceeding
Redo: Repeat action has ignored
Insert Chart: Drawing chart
Insert Table: Insert a table
Table and Borders: Display table and Borders toolbar (border)
Insert Hyperlink: Inserts a hyperlink
Expand All: Extending the title and text to slide on the Outline tab
Show Formatting: The hidden characters or formatting
Show / Hide Grid: Current or hide gridlines
Color / Grayscale: The presentation projector with color, black, white or grayscale
Zoomhong to slide, the outline tab or the tab Slide
Formatting toolbar
Thanhcong specific format located near the top of the screen. Each expression tuongthanh tools that function separately allows you to change effects in the slide doituong PowerPoit.
The icon on the Formatting toolbar and functions:
Font: Select font style from the drop-down list
Font Size: Choose the font size from the drop-down list
Bold: Apply bold formatting to text
Italic: Apply italic formatting for text
Underline: Applying formatting to text turnover foot
Shadow: Apply shadow formatting to text
Align left: Based margin text or object to the left
Center: Align the text or objects margin between lines
Align Right: Align decoration text or object to the right
Distributed: Based margin text or objects
Text Direction Change: Change text direction (horizontal - vertical)
Numbering: Add / remove the current format of the text is selected
Bullets: Add / remove characters to format the current selected text
Increase Font Size: Increase font size
Decrease Font Size: Decrease Font Size
Decrease Indent: Decrease margin of the text
Increase Indent: Increases margin of the text
Font Color: Color Conversion
Slide Design: Show Slide Design Task Pane
New Slide: Insert a new slide
Insert a new slide
From the Insert menu, click New Slide.
Or click New Slide on the upper expression Formatting toolbar
MS PowerPoint - Lesson 3: The PowerPoint toolbar tt
Insert a copy of slides
From the Insert menu, click Slide Duplicat
Copy and paste slides
You can copy and paste the slide in Normal View to Outline and Slides tab or in Slide Sorter view
Copy the slide to Outline
Click on the icon you want to copy slides
Click the Copy icon on the Standard toolbar.
Or right click on the icon and choose Copy slide
Paste slide
Click on the icon located to slide or slide set has copied
Click the Paste icon on the Standard toolbar. Or right click on the icon and select Paste slide
Note: You can also copy and paste the slide Slides tab or in Slide Sorter mode.
Delete Slides
You can delete the slide in Normal view mode and the Outline tab or Slides Slide Sorter view
Delete slides with Outline
Click on the icon of the slide slide you want to delete
From the Edit menu, click Delete Slide.
Or right click on the icon of the slide slide you want to delete and select Delete Slide
Delete Slide the tab slides
Click the slide thumbnail you want to delete the slide
From the Edit menu, click Delete Slide
Or right click on the thumbnail of the slide slide you want to delete and select Delete Slide
Delete slides in Slide Sorter view
Click the slide thumbnail of the slide you want to delete
From the Edit menu, click Delete Slide.
Or right-click the thumbnail of the slide slide you want to delete and select Delete Slide
PowerPoint template design is available including design color schemes, slide and title of the font styles and custom formats, all designed for a particular purpose.
After applying a design PowerPont, each time you add a new slide, the slide will have the same interface as a model of the slide. You can use Section New Presentation to create a new slide show from the design.
Create a new slide show from the design
Click From design template in the New Presentation

You will immediately see the designs available are shown below. For example, if you click on the Mountain Top Model will be replaced with models that slide as shown below:

Background color of the slide is available and you just insert the text into
Program AutoContent Wizard of PowerPoint
AutoContent Wizard allows you to create a presentation based on the content and recommendations set keduoc available. This feature will provide ideas to create slideshows available to you and just edit the necessary information or add your own spots to emphasize.
Create a new slide show using Autocontent Wizard
- Click AutoContent From the New Presentation Wizard ...
- Show AutoContent Wizard dialog box, click Next to continue.

- You need to select a model to create a slideshow. If you click the All button, then you can use the scroll bar to scroll down the list and select the type of slideshow.
Note: Some options shown may not be installed on the system and asked to banse Microsoft Office installation disc to install more before use.
- Click the Next button to continue
- The next step is decide how you will use the slide show. Default On-screen presentation is selected.
- Click Next to continue.
- You can enter a title and information of the page (footer) to the original projection
- Click the Next button to continue
- Click Finish to complete the creation process through AutoContent Wizard.
-Then you may need to open each slide, based on the instructions that created AutoContent Wizard to edit the content accordingly.
In the previous article we guide you how to create a slide show designs that come with fonts, color schemes and layout accordingly. In this article we will learn the format slide projector manually based on the colors and layout that the program supports.
Select the Layout for the slide of the slide show
Slide layout in PowerPoint is the sort position components in a slide interface. Each slide contains components associated with different content and different typefaces. A slide base is parsed header (title) and basic contents.

Show Slide Layout section (if closed)
* From the Format menu, click Slide Layout
Applying text to a slide layout
* From the Slide Layout, under Text Layouts, click the layout you want special
Text Layout usually only contain text. The layout include: Text Slide (Only text), Title Only (Only the title), Title and Text (title and content), Title and 2-Column Text (title and two columns noidung ), Title and Vertical Text (title and content vertically), vaVertical Title and Text (vertical and title text)
Applied to a slide layout content
* From the Slide Layout, the Content Layouts, click on the type of layout you want
* Content layouts include: Charts, Clip Art, Pictures, Tables, Diagrams or Organization Charts, or Media Clips
Apply layout and text content for a slide
* From the Slide Layout, in the Text and Content Layouts click the layout you want
* Text and Content Layouts including text, in addition interfere with maps, tables ... in the same slide.
Apply different layout to a slide
* From the Slide Layout, click the Layouts in Other types of layout that you want
* Other Layouts layout other than the text, content, content and text together.
The format for the slide show
The background can be applied to the slide, notes, notice in PowerPoint. Background options (Backgroud) can change the color, Gradient, Texture, Pattern, or Picture.
Select background color for the slide show
* From the Format menu, click Background

* Click the drop down arrow and select the color you like, then click Apply.
* Click More Colors to select more color
The selection effects for the slide show
* From the Format menu, click Background
* Click the down arrow and choose Fill Effects. Fill Effects dialog box appears
* Select the Gradient, Texture, Pattern, or Picture to apply effects. Select the color you like.
* Click More Colors to select more color
The selection effects for the slide show
* From the Format menu, click Background
* Click the down arrow and choose Fill Effects. Fill Effects dialog box appears
* Select the Gradient, Texture, Pattern, or Picture to apply effects. Select the color you like.

* After you have finished selecting appropriate colors, click OK
* Back window background, have four buttons:
o Apply to All: apply formatting to all the browsers
o Apply: Apply the format for the current browser
o Cancel: Ignore the format
o Preview: Preview the selected background color
* Click on the button that you need
* Back window background, have four buttons:
o Apply to All: apply formatting to all the browsers
o Apply: Apply the format for the current browser
o Cancel: Ignore the format
o Preview: Preview the selected background color
* Click on the button that you need

* To insert the date and time, click on the box Date and time
* To review the page for the presentation, slide number area in the box
* If you insert the footer, make sure that the Footer is selected and type in the content.
* Click Apply to apply to the current slide. Click Apply to All to apply to all slides.
Numbered automatically (Bullets and Numbering)
Bulletsand Numbering is a tool used to measure the number automatically. Bullets and numbering for your choice of designs, sizes and different colors can be applied.
Add or remove bullets himself up votes
* To highlight the text, you may want to add or remove categories of characters in line
* Click the Bullets icon on the Formatting toolbar
Change the line style characters
* From the Format menu, click Bullets and Numbering

Click the style you want.
* Click OK
Creating custom bullets
* From the Format menu, click Bullets and Numbering
Since Bullets and Numbering dialog box, click the Customize button to display the Symbol dialog box,
* Click OK
Creating custom bullets
* From the Format menu, click Bullets and Numbering
Since Bullets and Numbering dialog box, click the Customize button to display the Symbol dialog box,

* Select a bullet style suit and click OK
Add or remove automatic
* To highlight the text you may want to add or remove automatic
* Click the Numbering icon on the Formatting toolbar
Change type automatic
* From the Format menu, click Bullets and Numbering.
* Click the Numbered. Select type of auto you want.
* Click OK
Change the color of characters or bullets automatic
* From the Format menu, click Bullets and Numbering
* Click the down arrow for Color drop-down menu box.
* Choose colors that you like
Click OK.Drawing toolbar in PowerPoint offers many commands for creating and editing graphics. Toolbar is located at the bottom of the screen PowerPoint.

Show drawing toolbar
From the View menu, go to Toolbars and select Drawing
Here are some symbols and functions of the Drawing toolbar
Drawing Allows application of adjusted payment for different subjects to draw. Select Objects Allows select a drawing object. If you want to select multiple objects, hold down the Shift AutoShapes Click the AutoShapes icon to see a list of objects drawn. Move the cursor to set the shape and select Use Line to draw the line. To draw horizontal or vertical lines, hold the Shift key while dragging Arrow Suu used to draw the line with arrows Using Rectangle drawing rectangles. To draw a square, hold the Shift key while dragging. Using drawing oval oval. To draw the circle correctly, hold the Shift key while dragging. Text Box is used to draw a box containing text. Vertical Text Box Used to draw vertical box containing text using the Insert WordArt to insert different styles of WordArt Insert Diagram or Organization Chart Used to insert the diagram or organization chart Insert Clip Art Used to insert drawings available Insert Picture Used to insert images from the location you specified Fill Color Used to highlight objects Using Color Line is drawn to highlight the objects are selected. Font Color Formatting text color for text in drawing objects. Line Style Used to determine the type of line drawing Style Use Dash to determine the type of line strokes off Arrow Style Used to determine the type of flow arrow Click Shadow Style style ball that you want to use for the object. 3-D Style Click the 3D model that you want to useAdding AutoShape
- Click the AutoShape icon on the Drawing toolbar to display the menu AutoShape
- Click the AutoShape you want to use
- Click where you want to start drawing objects.
- Hold the left mouse button while dragging the object to be painted as you want
- Release the mouse button when the balance was
- To adjust the image, select image and drag to adjust equipment
Draw a line
- Click the Line icon from the Drawing toolbar. Cursor changes into the plus
- Click where you want to start pulling. Release the mouse when you want to end
Draw an arrow at the top
- Click the Arrow icon on the Drawing toolbar. Cursor changes into the plus sign when the cursor up slide
- Click where you want to start and drag. Release the mouse to the end
Draw a rectangle
- Click the Rectangle icon on the Drawing toolbar. Cursor changes into the plus
- Click where you want to put a rectangular or cube to begin. When finished, release the mouse cursor
Draw oval
- Click on the icon on the Drawing toolbar Oval. Cursor changes into the plus
- Click where you want oval or circle is started. When finished, release the mouse cursor
Create a Text box (the box containing the text)
- Click the Text Box icon on the Drawing toolbar
- From the top position the cursor, press the left mouse button. Drag until sufficient, then release the mouse
- Box of characters will appear in the document, you can type in text or images on it.
MS PowerPoint - Lesson 6: Drawing Toolbar tt
Create a text box along
- Click on Vertical Text Box icon on the Drawing toolbar
- The seal of the cursor position, press the left mouse button. Drag until you want to stop, then release the mouse
- Box of characters displayed in the document, you can type text and add photos to the right
Creating a WordArt object
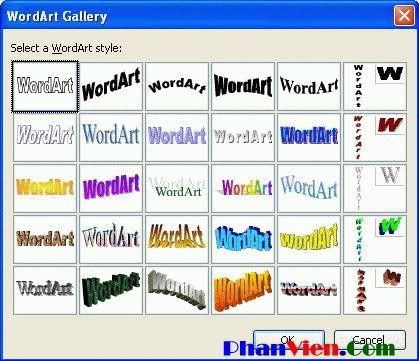
- Click on the icon on the WordArt toolbar Inser Drawing
- From the WordArt Gallery option type you want and click the OK button
- Edit WordArt Text dialog box appears, type text on the "Your Text here"
- Click the OK button to insert WordArt. You can find WordArt placed in slide
Create a diagram or organization chart
- From the WordArt Gallery option type you want and click the OK button
- Edit WordArt Text dialog box appears, type text on the "Your Text here"
- Click the OK button to insert WordArt. You can find WordArt placed in slide
Create a diagram or organization chart

- Click on the icon on the Insert Diagram or Organization Chart toolbar Drawing
- From the Diagram Gallery dialog box, select a chart that you want, then click OK
Insert a clipart
- Click the Insert Clip Art icon on the Drawing toolbar to open the box Clip Art
- From the Diagram Gallery dialog box, select a chart that you want, then click OK
Insert a clipart
- Click the Insert Clip Art icon on the Drawing toolbar to open the box Clip Art

- Search for: field lets you enter one or more related to a graphics muontim you are looking for. Every once entered, click the Go button to begin the search. Note: During that time, the Internet must be connected.
- Click Organize clips .... (Blue text)
- Click Organize clips .... (Blue text)

- You can see, there are items such as the Arts, Animals, .... Each type has several clip art
- Right-click the next picture and choose Copy
- From the Microsoft Clip Organizer window, click 2 times click Office Collections.
- Right-click the next picture and choose Copy
- From the Microsoft Clip Organizer window, click 2 times click Office Collections.

- Take your cursor to the location where you place clip art. Click the Paste icon on the Formatting toolbar
Insert a picture
- Click the Insert Clip Art icon on the Drawing toolbar to open the Insert Picture dialog box
- Select the image you want to insert and click Insert button
Insert a picture
- Click the Insert Clip Art icon on the Drawing toolbar to open the Insert Picture dialog box
- Select the image you want to insert and click Insert button
0 comments:
Post a Comment